
If you have not heard of the wind belt, read about it here.
I wanted to make one of my own, so I set out to build one on my own out of wood, duct tape, copper wire , magnets, and carriage bolts.
This first image shows the first material I tried - duct tape (aka duck tape, gun tape, handyman secret weapon)
I could not find a store that carried the Mylar-coated-taffeta that the video recommends, so I had to resort to trying a plethora of other materials. (to name a few: polystyrene ribbon, packaging tape, latex, scotch "extreme" tape)
I found that the material has to have the right balance between elasticity, density, and plasticity to be a candidate for this device. The latex fluttered a great deal, but the range of motion was too high. The extreme tape did not have enough motion. The duct tape worked well, but the material I finally settled on: gorilla tape in the 1" roll. I had to put two pieces together with the sticky sides facing each other. (I still plan on trying out the taffeta, once I find it...)
 The support structure is about 5 feet long, 5 inches wide. There are 2 clamps to hold the tape. a clamp on 1 side has longer carriage bolts to adjust the tension. I found that one needs an even tension across the belt to get it to vibrate.
There are many factors in this vibration system: the tension, the placement/mass of the magnets, the mass/length of the band, the length of the band, and the resonances of the support structure. I'm sure you could apply some string vibration equations to calculate your ideal tension and length. I chose to spend hours in a windy basement with a wrench. Besides, I forget the name for this type of motion, but the 1 dimensional Helmholtz equations do not fully describe it. In addition to a propagation along the band, there is a side to side wobble, like the Tacoma Narrows bridge.
I already had the button magnets, which I got for another project here. I had to wind the coils myself. The wire - I got at Axeman for $20. You can also get it from guitar-part stores... like here .
Once you wind the coils, you need to solidify them - I soaked these in a bath of molten beeswax/paraffin for an hour or so. Once you get your coils solidified, you can solder on leads, and attach whatever led's / rectifiers you have in mind. I could not get enough voltage as of yet to power any low voltage inverters I had laying around, but once you figure the right circuitry you could most likely power a light, recharge a battery. Maybe a couple of these could run a wireless repeater? I have it hooked up to 4 LED's (2 for each coil). The reason: the electricity coming out of the coils is AC, alternating current. LED's only conduct electricity in one direction. If you attach 2 LED's in opposite orientations to a coil, together they will conduct both currents coming out of the coil (one for +, one for -)
I don't have a use for this ... but it is kinda cool to have. If anything, it is entertainment for the neighbors when they see me running back and forth in my backyard in the middle of the night, holding this big wood thing with blinking lights.
More pictures:
The top non-adjustable clamp:


The "bridge", to adjust the length of the belt:

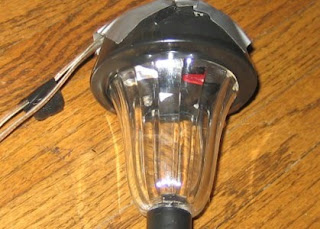
4 LED's in the lamp enclosure:

No comments:
Post a Comment